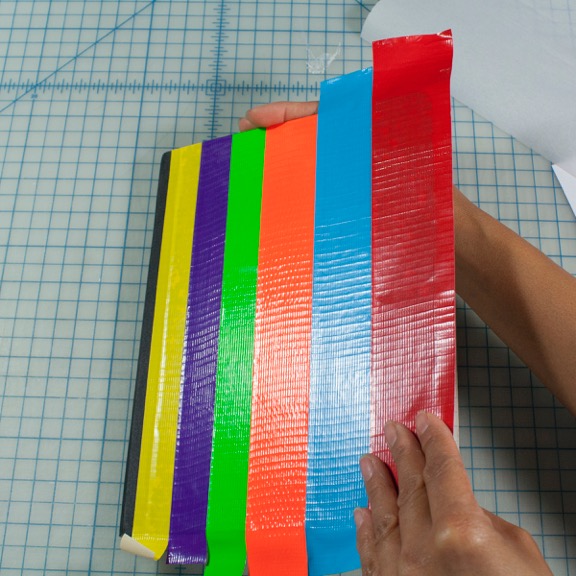
Project #1: Notebook/Binder Decoration
Materials: duct tape, notebook
Tools: parchment paper, pencil, scissors
Additional tool: bubble letter stencil (the one used in photo is a free printable from Woo Jr).
1. Cover front of notebook with vertical strips of duct tape.
2. Fold the duct tape strips over the top, bottom, and right edges of the cover.
3. Trace letters onto the parchment paper.
4. Cover the traced letters with a strip of duct tape.
5. Flip over the parchment paper. You should be able to see the traced letters.
6. Using a pair of well-oiled scissors, cut out the letters.
7. Move around the cut letters on the notebook cover until you find an acceptable position.
8. One by one, remove the parchment paper on the back of each letter and adhere it onto the notebook cover.
Project #2: Pencil Case
Materials: white, blue, yellow, light blue, gold, orange, green, red, and fuchsia duct tape; two round neodyne magnets, key chain ring
Tools: self-healing cutting matt, corked back metal ruler, craft knife, parchment paper, one-eighth inch hole puncher
1. Place a parchment paper measuring 10 inches wide x 15 inches high on top of your worktable.
Starting from the bottom, place nine strips of white duct tape across the parchment paper. Be sure the strips overlap along the long edges by at least one-eighth inch. Flip over and place the duct tape/parchment paper on your worktable in the landscape position. Peel off parchment paper. Starting at the bottom of the half-made fabric, place six strips of blue duct tape across it. Be sure the strips overlap along the long edges by at least one eighth inch. Trim down the fabric to 10 inches x 15 inches. (See my instructional video.)
2. Place the fabric on your worktable in the portrait position, white side facing up.
3. Cut two strips of six-inch white duct tape.
Measure and mark six inches from the bottom left and right corners of the fabric. Starting at the two marks, vertically place each strip along the left and right edges. Be sure the strips are halfway on the fabric.
4. Fold back the vertical tape strips and pull up the bottom portion of the fabric. Push down along the outer edges to form the main pocket.
5. Trim the corners of the flap in a curved line.
6. Cut 12-inch strips of various colored tape.
Trim the width of each trip to one-fourth inch. Use these strips to decorate the front of the pencil case. Trim edges of strips that extend past the edges of the pencil case.
7. Flip bag over so the opening is face up.
Place a magnet on the inside of the flap, centered and approximately one-half inch from the top edge. Cover with a piece of white duct tape.
8. Place a magnet inside the pocket, centered and approximately one-half inch from the bottom edge.
Push it agains the top fabric of the pocket and cover from the inside with a piece of white duct tape.
9. Using the hole puncher, make a hole on the upper left corner of the pencil case near the top of the pocket.
10. Loop the key ring through the hole.
11. Close the flap and flip the bag over.
Project #3: Cell Phone Case
Materials: fuchsia and multi-colored chevron duct tape, bubble wrap, cell phone
Tools: self-healing cutting mat, ruler, scissors, ball point pen, pencil
1. Cut two rectangles from the bubble wrap that are one-half wider than your phone.
2. Trim down the height of the bubble wrap rectangles to one inch shorter than height of your cell phone.
3. Fold strips of fuchsia duct tape over the top edges of the bubble wrap rectangles. Trim down the left and right edges.
4. Place one rectangle on top of the other and line up the edges.
Starting from the top edge, horizontally place 10-inch strips of fuchsia duct tape on the bubble wrap rectangles, overlapping the strips along the long edges by approximately one-eighth inch. Flip over the bubble wrap rectangles. Fold the left and right edges of the strips over the rectangles, creating a pocket.
5. Horizontally place a strip of fuchsia tape halfway along the bottom edge of the pocket. Fold the strip under the pocket to close up the bottom.
6. Draw eight flower petals on the parchment paper and cover drawn petals with chevron duct tape.
7. Flip the parchment paper so the drawn petals are visible. Using a pair of well-oiled scissors, cut out the petals.
8. Move around the cut petals on the cell phone case until you find an acceptable position.
One by one, remove the parchment paper on the back of each petal and adhere it onto the cell phone case.


