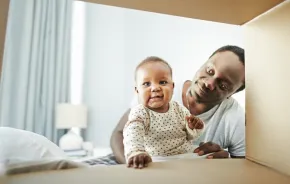
 When my son was born everyone told me to take a lot of photos and video because “they grow up so fast,” but the crazy days and nights during the first few months made this so difficult, even for me, a professional photographer.
Now my son is 11 and the baby he was is long gone, but I still have some precious memories and some great images to look back on to remind me of his babyhood.
These days we can snap a great mobile phone or digital camera image anytime (see 11 Pro Tips for Making Your iPhone the Only Camera You Need), but I find that my best baby shots take a little more time and planning.
Tip #1: Timing is everything
I like to start shooting during nap time. There isn’t anything much more beautiful than a sleeping baby, and sometimes you can arrange them in their crib without waking them. Prime photo time is after they wake. With babies this might be a 20-minute time window, but this will vary of course. Be ready because that elusive smile or giggle might just happen once. Patience is required, but a quick shutter finger is even more important!
Also, there are certain ages/stages that are so important to document. I am so glad I got a newborn shot of my son. A trick here is to actually wait a day or two, as newborns often will look better then than the day they are born. The next stage is around 3–4 months, or when they can hold their head up. Also try to capture that first smile or laugh, crawl, steps, etc.
Next: #2: Start with mom or dad holding baby
 Tip #2: Start with mom or dad holding baby
It is so important that baby is as comfortable as possible and photos cuddling with mom, dad or other family members are great. You can compose your shot with both people or just the baby. Try putting the baby on a shoulder facing backward.
Tip #3: Get baby’s attention gently
Try taping a favorite toy to your camera just above the lens or have one parent stand right behind your camera in order to get the baby to look at you. Don’t have a crowd of helpful people standing behind you or you will only get photos of a confused baby looking in all directions.
Next: #4: Find a bright area with a plain background
 Tip #4: Find a bright area with a plain background
Great light is so important! The best place to take the photo is inside near a window on a cloudy day. If you are outside, a cloudy day is best or look for a spot in full shade on a sunny day. After finding the best light, the next step is to find the best background. Try to make it as clutter-free as possible and hopefully it will be darker than where baby is sitting. Think of it this way — the baby is your subject, not whatever is behind him.
Tip #5: Your number one accessory? A white sheet
This is such a wonderful trick! I always carry a white sheet in my camera gear. If it is a sunny day drape it over a window and it will fill the room with beautiful glowing light. Also use it on the ground for the baby to lay on, then pull the corners up behind the baby to create a nice even background. Get the least expensive queen-size sheet you can find. Why go on the cheap? The lower thread count will let more light through.
Tip #6: Get down on baby’s level
Yes, this means you have to lay on the ground! Try to get them to hold their head up and look toward you. Your camera should be just a few inches above the ground, or at baby’s eye level.
Next: #7: Taking baby aerial shots
 Tip #7: Skycam! Taking baby aerials
Some of my favorite shots are “baby aerials.” No, you don’t need to rent a helicopter — just position your camera directly above the baby while she is lying down. It is good to do this when your baby subject is lying on an even surface (background) like your white sheet, on a piece of furniture, or someone’s back!
Next: #8: Capturing precious details
 Tip #8: Details, details, details!
Cute little chubby feet, tiny fingers, face close-ups — so many adorable possibilities! Try adding props and adult hands to show scale.
Next: #9: Shoot with a film camera
 Tip #9: Shoot with a film camera
If you want something out of the ordinary, shoot an actual roll of film! I have the best digital equipment available, but the black and white film photos I took of my son are so unique and gorgeous.
Dig out that old film camera or find one cheap at the thrift shop or on eBay and put in a roll of Kodak TRI-X 400 film (yes, they still make it!).
You can take it to a lab that specializes in black and white developing (I recommend Panda Lab in Seattle) and have the developed film scanned to a CD so you also have digital versions of the images.
Tip #10: Camera settings
If your camera has a zoom, then zoom in closer, even if you have to stand back further. This will help keep your baby in focus while blurring out the background.
If your camera has ISO speed settings, try around 400, which should be good for shooting on a cloudy day.
If you can set the lens aperture, make sure it is as open as possible. The smaller aperture numbers mean that the lens is more wide open, like 2.8, 3.5, 4, 5.6. A wider aperture lets in more light and also helps blur the background.
Next: #11: Photo fun with software
 Tip #11: Have fun using software to create unique versions of your shots
I use several different programs to edit my photos, but there are some that are created just for making your images look cool with special filters. I like CameraBag 2 (for PC, Mac) and Pixelmator (for Mac). Also try this cool online tool called Pixlr-o-matic that lets you upload a photo from your computer, process it in the web interface and then download the new version back to your computer.
I hope this article is useful to you — thanks for reading and happy photographing!
Connect with Will Austin on Twitter @willaustinphoto, or view his work at willaustin.com.


